
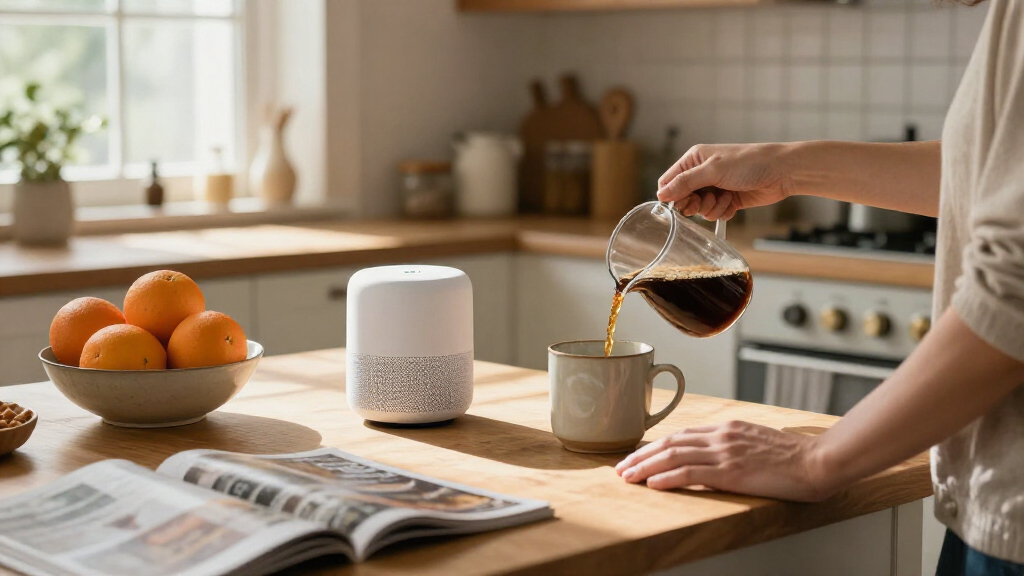

Set up a smart home voice assistant to control compatible lights, plugs, thermostats, or other devices by speaking to a smart speaker or phone. This guide is for beginners with a working home Wi-Fi network and a compatible assistant device. Plan for 30-60 minutes, depending on how many devices you connect.

Get everyday essentials delivered free with Prime
- Fast, free delivery on millions of items
- Prime Video, Amazon Music and more included
- Member-only deals all year
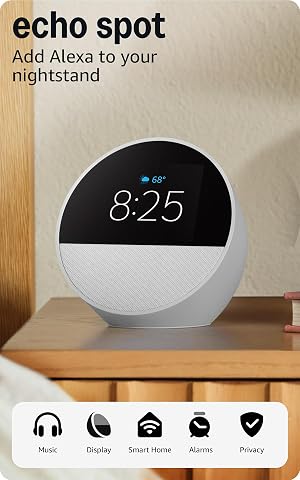
Amazon Echo Spot Smart Alarm Clock with Alexa, Glacier White
- ✔ Display: 2.83-inch touch screen, 240 × 320 pixels
- ✔ Speaker: 1.73-inch full-range built-in speaker
- ✔ Wi-Fi: Dual-band 2.4 and 5 GHz

Google Home Smart Speaker, South Korea Model, White/Slate
- ✔ Model: GA00341-KR
- ✔ Audio: Stereo, 2 channels; 10 W maximum output
- ✔ Driver: 50 mm
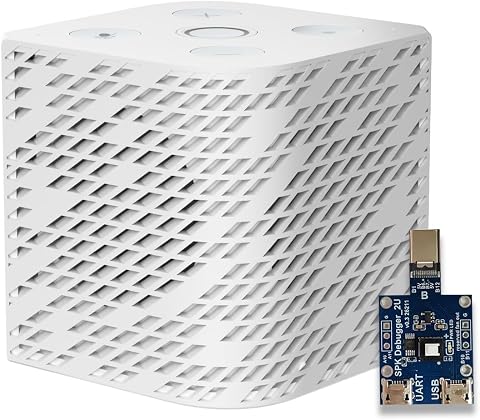
Third Reality Voice and Music Assistant Dev Edition
- ✔ Operating system: Linux
- ✔ Processor: Quad-core ARM A53
- ✔ Memory: 256 MB RAM
Difficulty: Beginner | Time: 30-60 minutes
What You’ll Need
Tools & Materials:
- A smart speaker, display, or phone with a voice assistant
- A smartphone or tablet with the assistant’s official app
- Home Wi-Fi name and password
- Compatible smart home devices and their setup instructions
Knowledge:
- Basic ability to install an app and connect a device to Wi-Fi
- Access to the account used for the assistant and smart devices
Check each device’s packaging or manufacturer app for compatibility with your voice assistant. Some devices require a separate hub or a 2.4 GHz Wi-Fi connection. Place the speaker where it can hear you and connect to Wi-Fi before adding devices.
Amazon Echo Spot Smart Alarm Clock with Alexa, Glacier White
The Echo Spot is our best all-around recommendation because it makes voice control part of a familiar bedside routine. Its 2.83-inch touch screen can show the time, weather, and song information, while Alexa handles alarms, routines, music, and compatible smart home controls. That combination makes it easier to check a status at a glance than with the audio-only Google speaker, and it asks less technical setup knowledge than the Home Assistant-oriented Third Reality device.Its strengths are deliberately focused: a small display, a built-in speaker, and Alexa access in a compact alarm-clock form. The no-camera design and microphone-off button give buyers tangible privacy controls. Dual-band Wi-Fi also distinguishes it from Third Reality’s 2.4 GHz-only connection. The tradeoff is that the screen is modest, and this is not a general-purpose smart display. eero extension is conditional on owning a compatible eero router and completing the linked setup, so we would treat it as a bonus rather than a core reason to choose the Spot. Buyers needing advanced Home Assistant flexibility should look to Third Reality instead.
Pros:
- Alexa routines, alarms, and compatible smart home controls in one bedside device.
- Small touch display shows clock, weather, and song information.
- No camera; physical microphone-off button is included.
- Dual-band Wi-Fi supports 2.4 and 5 GHz networks.
Cons:
- The 2.83-inch display is compact for visual tasks.
- eero extension depends on a compatible router, linked accounts, and app setup.
- Some Bluetooth speaker and device configurations are unsupported.
Best for: Alexa households seeking a bedside assistant for alarms, routines, quick smart home commands, and glanceable information.
Not ideal for: Buyers who need a larger display, deep Home Assistant customization, or eero coverage without a compatible eero router.
Bottom line: Choose the Echo Spot for the most approachable mix of Alexa voice control, bedside routines, and at-a-glance information.
“Choose the Echo Spot for the most approachable mix of Alexa voice control, bedside routines, and at-a-glance information.”
Google Home Smart Speaker, South Korea Model, White/Slate
For a home already organized around Google Assistant, Nest, Chromecast, and compatible smart devices, this Google Home speaker is the clearest ecosystem fit in the lineup. It combines voice control, a built-in microphone, Wi-Fi, and Bluetooth in a compact tabletop design. Its stereo audio and 10-watt maximum output give it a more speaker-centered profile than the screen-led Echo Spot, while its assistant remains the main route to controlling connected devices.The key buying caveat is regional: this is the South Korea model, and a US wall plug is not included. We would factor in the need for a suitable adapter or converter before choosing it for a US home. It also lacks the Spot’s clock display and physical microphone-off detail in the supplied product information, and it does not have Third Reality’s Home Assistant developer tools. Its best case is therefore a Google-centered household that wants a tabletop voice endpoint and accepts the power-plug complication. Skip it if you need a plug-ready US device or want to build around Home Assistant.
Pros:
- Built-in Google Assistant supports voice control and compatible smart home devices.
- Stereo output with 10-watt maximum power and a 50 mm driver.
- Wi-Fi and Bluetooth connectivity in a compact tabletop form.
- Works with compatible Nest and Chromecast devices.
Cons:
- South Korea model does not include a US wall plug; adapter or converter may be needed.
- Not waterproof.
- No display for clock, weather, or other glanceable information.
Best for: Google Assistant users who want a compact speaker for compatible Nest, Chromecast, and smart home devices.
Not ideal for: US buyers seeking a straightforward included wall plug, or households that prioritize Alexa routines or Home Assistant development tools.
Bottom line: Pick this speaker when Google Assistant is already the center of your home and the regional power requirement is manageable.
“Pick this speaker when Google Assistant is already the center of your home and the regional power requirement is manageable.”
Third Reality Voice and Music Assistant Dev Edition
Third Reality’s Dev Edition fills a role the other two do not: it is designed for Home Assistant voice capture and Music Assistant playback, rather than broad, plug-and-play ecosystem convenience. Its dual digital microphones capture voice input, and its built-in 3 W speaker can handle text-to-speech, streamed music, and system audio. That makes it a more integrated voice-and-audio endpoint than the Google speaker’s standard assistant setup, while offering a different kind of flexibility from the Alexa-oriented Echo Spot.This is the right choice when the household values control over its Home Assistant setup and wants tools such as firmware flashing, live logs, and on-device editing. Those capabilities can support adjustment and troubleshooting, but they also signal a more hands-on product. Its 256 MB of RAM and 512 MB of flash may constrain local workloads, and Wi-Fi is limited to 2.4 GHz. Buyers looking for easy bedside alarms and a visual clock are better served by the Echo Spot; those wanting a mainstream Google Assistant speaker should choose Google Home. Third Reality is compelling specifically when Home Assistant compatibility is the deciding factor.
Pros:
- Combines voice capture and audio playback in one device.
- Dual digital microphones and a built-in 3 W speaker support voice input, TTS, and music.
- Preloaded with Home Assistant Voice Assistant and Music Assistant.
- Firmware flashing, live logs, and on-device editing support customization.
Cons:
- Wi-Fi is limited to 2.4 GHz.
- 256 MB RAM and 512 MB flash may limit local workloads.
- Its developer-oriented tools are less suited to buyers seeking a simple appliance.
Best for: Home Assistant users who want a compact voice and audio endpoint with firmware, logging, and on-device editing tools.
Not ideal for: Buyers who want a simple mainstream assistant, robust local workloads, 5 GHz Wi-Fi, or a bedside display and alarm interface.
Bottom line: Choose Third Reality when Home Assistant integration and hands-on customization matter more than mainstream simplicity.
“Choose Third Reality when Home Assistant integration and hands-on customization matter more than mainstream simplicity.”
As an Amazon Associate we earn from qualifying purchases.
Before You Start
Use a unique password for each account when possible, and turn on two-factor authentication if available. Review the assistant’s microphone controls and privacy settings before placing it in a shared or private room. Keep device installation instructions nearby; some devices need to be set up in their own app before they can be linked to the assistant.
Step-by-Step Instructions
Step 1: Install the assistant app
Download the official app for your speaker or voice assistant from your phone’s app store. Sign in with the account you plan to use for the home. If you already use an account with smart devices, use the same account where practical to reduce linking steps.
Tip: Check the app publisher before installing; similarly named third-party apps may not manage your device.
Check: The app opens and displays your account or prompts you to add an assistant device.
Step 2: Connect the speaker or assistant
Plug in the speaker or display, then follow the app’s setup prompts to add it. Select your home Wi-Fi network and enter its password when asked. Give the device a clear name, such as “Kitchen speaker,” so you can recognize it in the app.
Tip: Keep the phone near the speaker during setup. If the app cannot find the device, check that Bluetooth and local network access are enabled for the app.
Check: The assistant appears in the app as online, and its status light or screen indicates it is ready.
Step 3: Set up each smart device
Install each light, plug, thermostat, or other device according to its manufacturer’s instructions. Use its own app if required, connect it to the correct Wi-Fi network or hub, and give it a simple name such as “Desk lamp.” Test the device in that app before linking it to the voice assistant.
Tip: Avoid names that sound alike, such as “hall light” and “wall light.” Distinct names are easier for the assistant to recognize.
Check: Each device responds to its manufacturer app and shows as online.
Step 4: Link the device service to the assistant
Open the assistant app and find its smart home, services, or device linking section. Choose the manufacturer or service for your device, then sign in and approve the connection. Follow any prompts to discover or import devices. Repeat these actions for each service you use.
Tip: Only approve access for the service you intend to control. If the service is not listed, check the device maker’s instructions for supported assistants.
Check: The linked service appears in the assistant app and its devices are listed.
Step 5: Organize devices by room
Assign each device to the room where it is used, using the assistant app’s room or group controls. Keep names and room assignments consistent: a device called “Desk lamp” in the office should not be assigned to the bedroom. Add speakers to the appropriate rooms if the app supports this.
Tip: Room groups let you use commands such as “turn off the office lights” without naming each light.
Check: The app shows the expected devices under each room, with no duplicate or unfamiliar entries.
Step 6: Test basic voice commands
Stand within clear hearing distance and use the assistant’s wake word followed by one simple command, such as “turn on the desk lamp.” Wait for the assistant’s response, then try turning the device off. Test one device at a time before using room-wide commands.
Tip: Speak at a normal volume and use the exact device name shown in the app. Background music and television audio can interfere with recognition.
Check: The intended device changes state, and the assistant confirms or otherwise indicates the action.
Step 7: Create a routine
In the assistant app, open routines or automations and create one with a simple trigger, such as a phrase you will say. Add one or two actions, such as turning off selected lights. Review the selected devices and save the routine, then speak its trigger phrase to test it.
Tip: Start with actions that are easy to observe and reverse. Some assistants limit available triggers or actions by device type.
Check: The trigger phrase runs the listed actions, and only the intended devices respond.
Step 8: Review privacy and access settings
Open the assistant’s privacy and security settings. Review voice recording controls, microphone mute options, household or guest access, and any voice purchasing settings. Turn off features you do not plan to use, and learn how to delete saved voice history if the service supports it.
Tip: A physical mute switch often disables listening until you switch it back on; check the device indicator to confirm its state.
Check: You can identify the microphone control and have reviewed who can use the assistant and which data settings are active.
Common Mistakes to Avoid
- Buying or setting up a device that does not work with the chosen assistant. — Check the device’s compatibility information before setup, including whether it needs a hub or a particular Wi-Fi band.
- Using vague or similar device names. — Give each device a short, distinct name and assign it to the correct room.
- Linking a device before completing its manufacturer setup. — Connect and test the device in its own app first, then link that service to the assistant.
- Creating a routine with unintended devices or actions. — Review every action and device in the routine, then test it while you can observe the result.
Troubleshooting
Problem: The assistant cannot find a smart device.
Solution:
Confirm that the device works in its manufacturer app and is online. Check that the correct service is linked in the assistant app, then run device discovery again. Restart the device or hub if it remains missing.
Problem: A voice command controls the wrong device or no device.
Solution:
Check the device name and room assignment in the assistant app. Rename devices with similar names, then try the command again using the full device name. Move closer to the speaker and reduce background noise if it does not recognize the request.
Problem: The speaker or smart device shows as offline.
Solution:
Check that your internet connection works, then confirm the device is connected to the intended Wi-Fi network. Reopen the relevant app and follow its reconnect instructions. Some devices only support a 2.4 GHz network, so check the manufacturer’s requirements.
Problem: The routine does not run as expected.
Solution:
Confirm that you used the saved trigger phrase and that the routine is enabled. Open its settings and check that every action points to the right device. Test the individual devices in the app, then run the routine again.
What Success Looks Like
Your assistant appears online, linked devices show as available, and a spoken command changes the intended device. Room commands affect the devices assigned to that room, and your test routine runs only its listed actions. You also know how to mute the microphone and where to review privacy settings.
Next Steps
Add devices in small groups and test each one before building more routines. Review device and account access when household members change, and update the assistant and manufacturer apps when updates are offered. If a device repeatedly disconnects, consult its manufacturer’s network and support instructions.
Frequently Asked Questions
Do I need a smart speaker to use a voice assistant?
No. Many phones offer a voice assistant, though a dedicated speaker may hear commands more easily from across a room and can stay in a fixed location.
Can I use smart devices from different brands?
Often, yes, if each device supports the same assistant or can connect through a compatible hub or service. Check support details for each model before setup.
Why does a device work in its own app but not by voice?
The device may not be linked to the assistant, or discovery may not have completed. Link its service in the assistant app, run discovery, and check its name and room assignment.
Can I stop the assistant from listening?
Use the speaker’s microphone mute control or the app’s microphone settings. Check the device’s indicator to confirm that mute is active, and review how to turn listening back on.
What should I do before moving a smart device to another room?
Update its room assignment in the assistant app and revise routines that refer to its old location. Test a room command after the move to confirm it controls the expected devices.